How to Sew your Own Simply Nights Nighttime Diaper
Pattern: Very Baby Diaper Pattern
Step One:
The Body: cut 1 layer microfleece or suedecloth
The Body: cut 2 layers of something that will still stretch for a good fit and also be very absorbent. I used 2 layers of organic french terry.

Step Two:
Quick Dry Soaker: cut 1 layer microfleece
Quick Dry Soaker: cut 4 layers of something trim and absorbent. I used 3 layers hemp french terry and 1 layer of organic french terry.
Simply Nights add on Soaker: using the soaker template, cut 2 layers 3/8" smaller all around. I used 2 layers of hemp french terry.
Use your rotary cutter so yours don't look as crappy as mine!
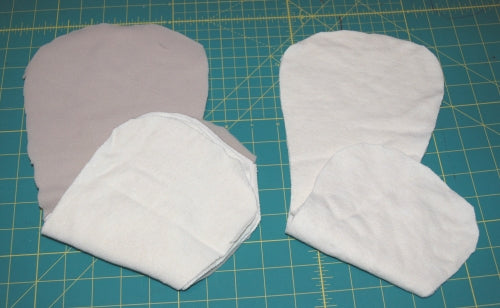
Compare sizes of two soaker sets; make sure the Simply Nights soaker is not larger than the original. You can mark the smaller soaker layers and just serge them off where they need to be.

Step Three: Sew the elastic in the body layers as directed; serge body layers together

Step Four: Serge the regular soaker with microfleece on top separately.

Step Five: Serge the two layers of the Simply Nights soaker separately.

Step Six: Layer the Simply Night Soaker underneath the original soaker and sew through all layers just at the top using a wide three step zig zag stitch. Go slow and sink your needle by hand first – it's a lot of layers for your machine to get through.
Here you can see the completed soaker laid into the shell. If you want to make it snap in, apply the snaps near the top of the SimplyNights soaker underneath.

I didn't make a doubler, but here is one I had in between the two soakers.

All done! Well, almost, it needs snaps.

